How to Install COMSOL Multiphysics®
The guide below features quick setup instructions for installing COMSOL Multiphysics® on Windows®, with notes when the process differs for macOS and Linux® operating systems. Descriptions of optional settings available in the COMSOL installer are included as well. Installing COMSOL Multiphysics® following these instructions requires a license for the software.
Note: Upgrading to a new version of COMSOL Multiphysics® is the same process as a new installation, which is shown in this article. New versions of COMSOL Multiphysics® can be installed without impacting existing installations.
Quick Setup for COMSOL Multiphysics
In order to ensure a smooth installation, there are a few steps to complete in preparation. You will need to:
- Gather your license information
- Add your license(s) to your COMSOL Access account
- Download the COMSOL installer
If you have already completed these steps and are ready to run the installer, you can skip directly to the installation video guide below.
Step 1. Gathering License Information
The first step to installing COMSOL Multiphysics® is verifying you have your license information. When you purchase a license, you will receive it in the form of a .dat file as an attachment from an @comsol.com email address. You must upload this active .dat license file to your COMSOL Access account before you can download the installer. (License files and the information about them are emailed to the contact that COMSOL has listed in its system; you may need to contact the person responsible for your organization's license files in order to download the installer.)
If you have a license subscription, you will receive emails from a COMSOL email address based out of your local office when new versions are released, which will allow you to install the most current version of COMSOL Multiphysics®.
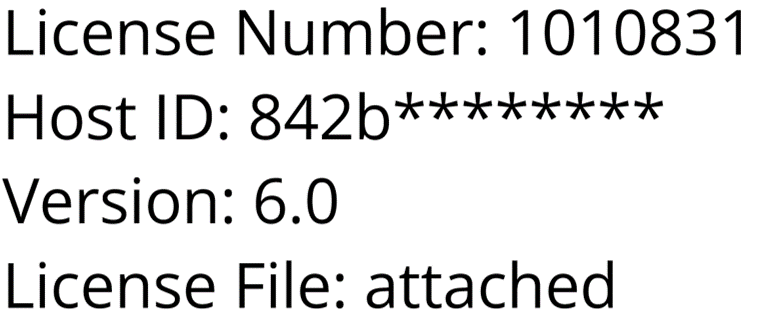 Three screenshots of example messaging from COMSOL license distribution emails that include license number, host ID, version, and license file attachment information. (1/3)
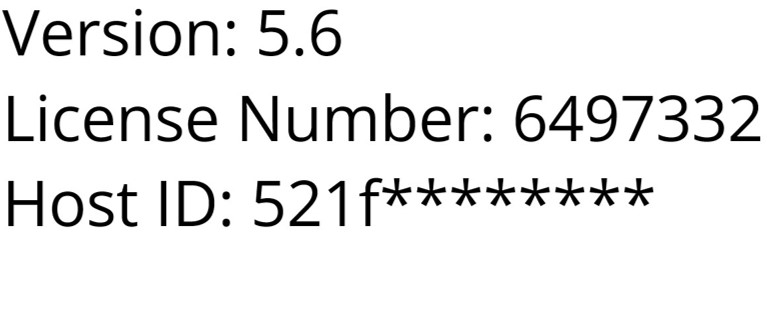 Three screenshots of example messaging from COMSOL license distribution emails that include license number, host ID, version, and license file attachment information. (2/3)
 Three screenshots of example messaging from COMSOL license distribution emails that include license number, host ID, version, and license file attachment information. (3/3)
If you have network licenses, you may need to complete extra steps. The COMSOL License Manager must be installed and running in your network for Floating Network Licenses (FNL), Class Kit Licenses (CKL), installations on Linux®, and installations in some regions of the world. You may refer to How to Install the COMSOL License Manager or contact your local administrator for assistance. You can also contact COMSOL Support for any further help you may need.
Step 2. Adding Your License(s) to Your COMSOL Access Account
COMSOL Access is an online service for current users and those interested in acquiring COMSOL Multiphysics®. Among its other benefits, a COMSOL Access account enables you to manage your license information and download the COMSOL installer. If you don't have a COMSOL Access account yet, you will need to create one in order to install COMSOL Multiphysics®.
To add your license information or trial passcode to your COMSOL Access account:
- Go to comsol.com/access. Log into your existing account or create a new one.
 A UI screenshot of the COMSOL Access login page on comsol.com shows the options to log in or create a new account.
The COMSOL Access login page on the COMSOL website, where you can log into or create a COMSOL Access account.
A UI screenshot of the COMSOL Access login page on comsol.com shows the options to log in or create a new account.
The COMSOL Access login page on the COMSOL website, where you can log into or create a COMSOL Access account.
- After you log in, click Manage License to go to the Manage Licenses page.
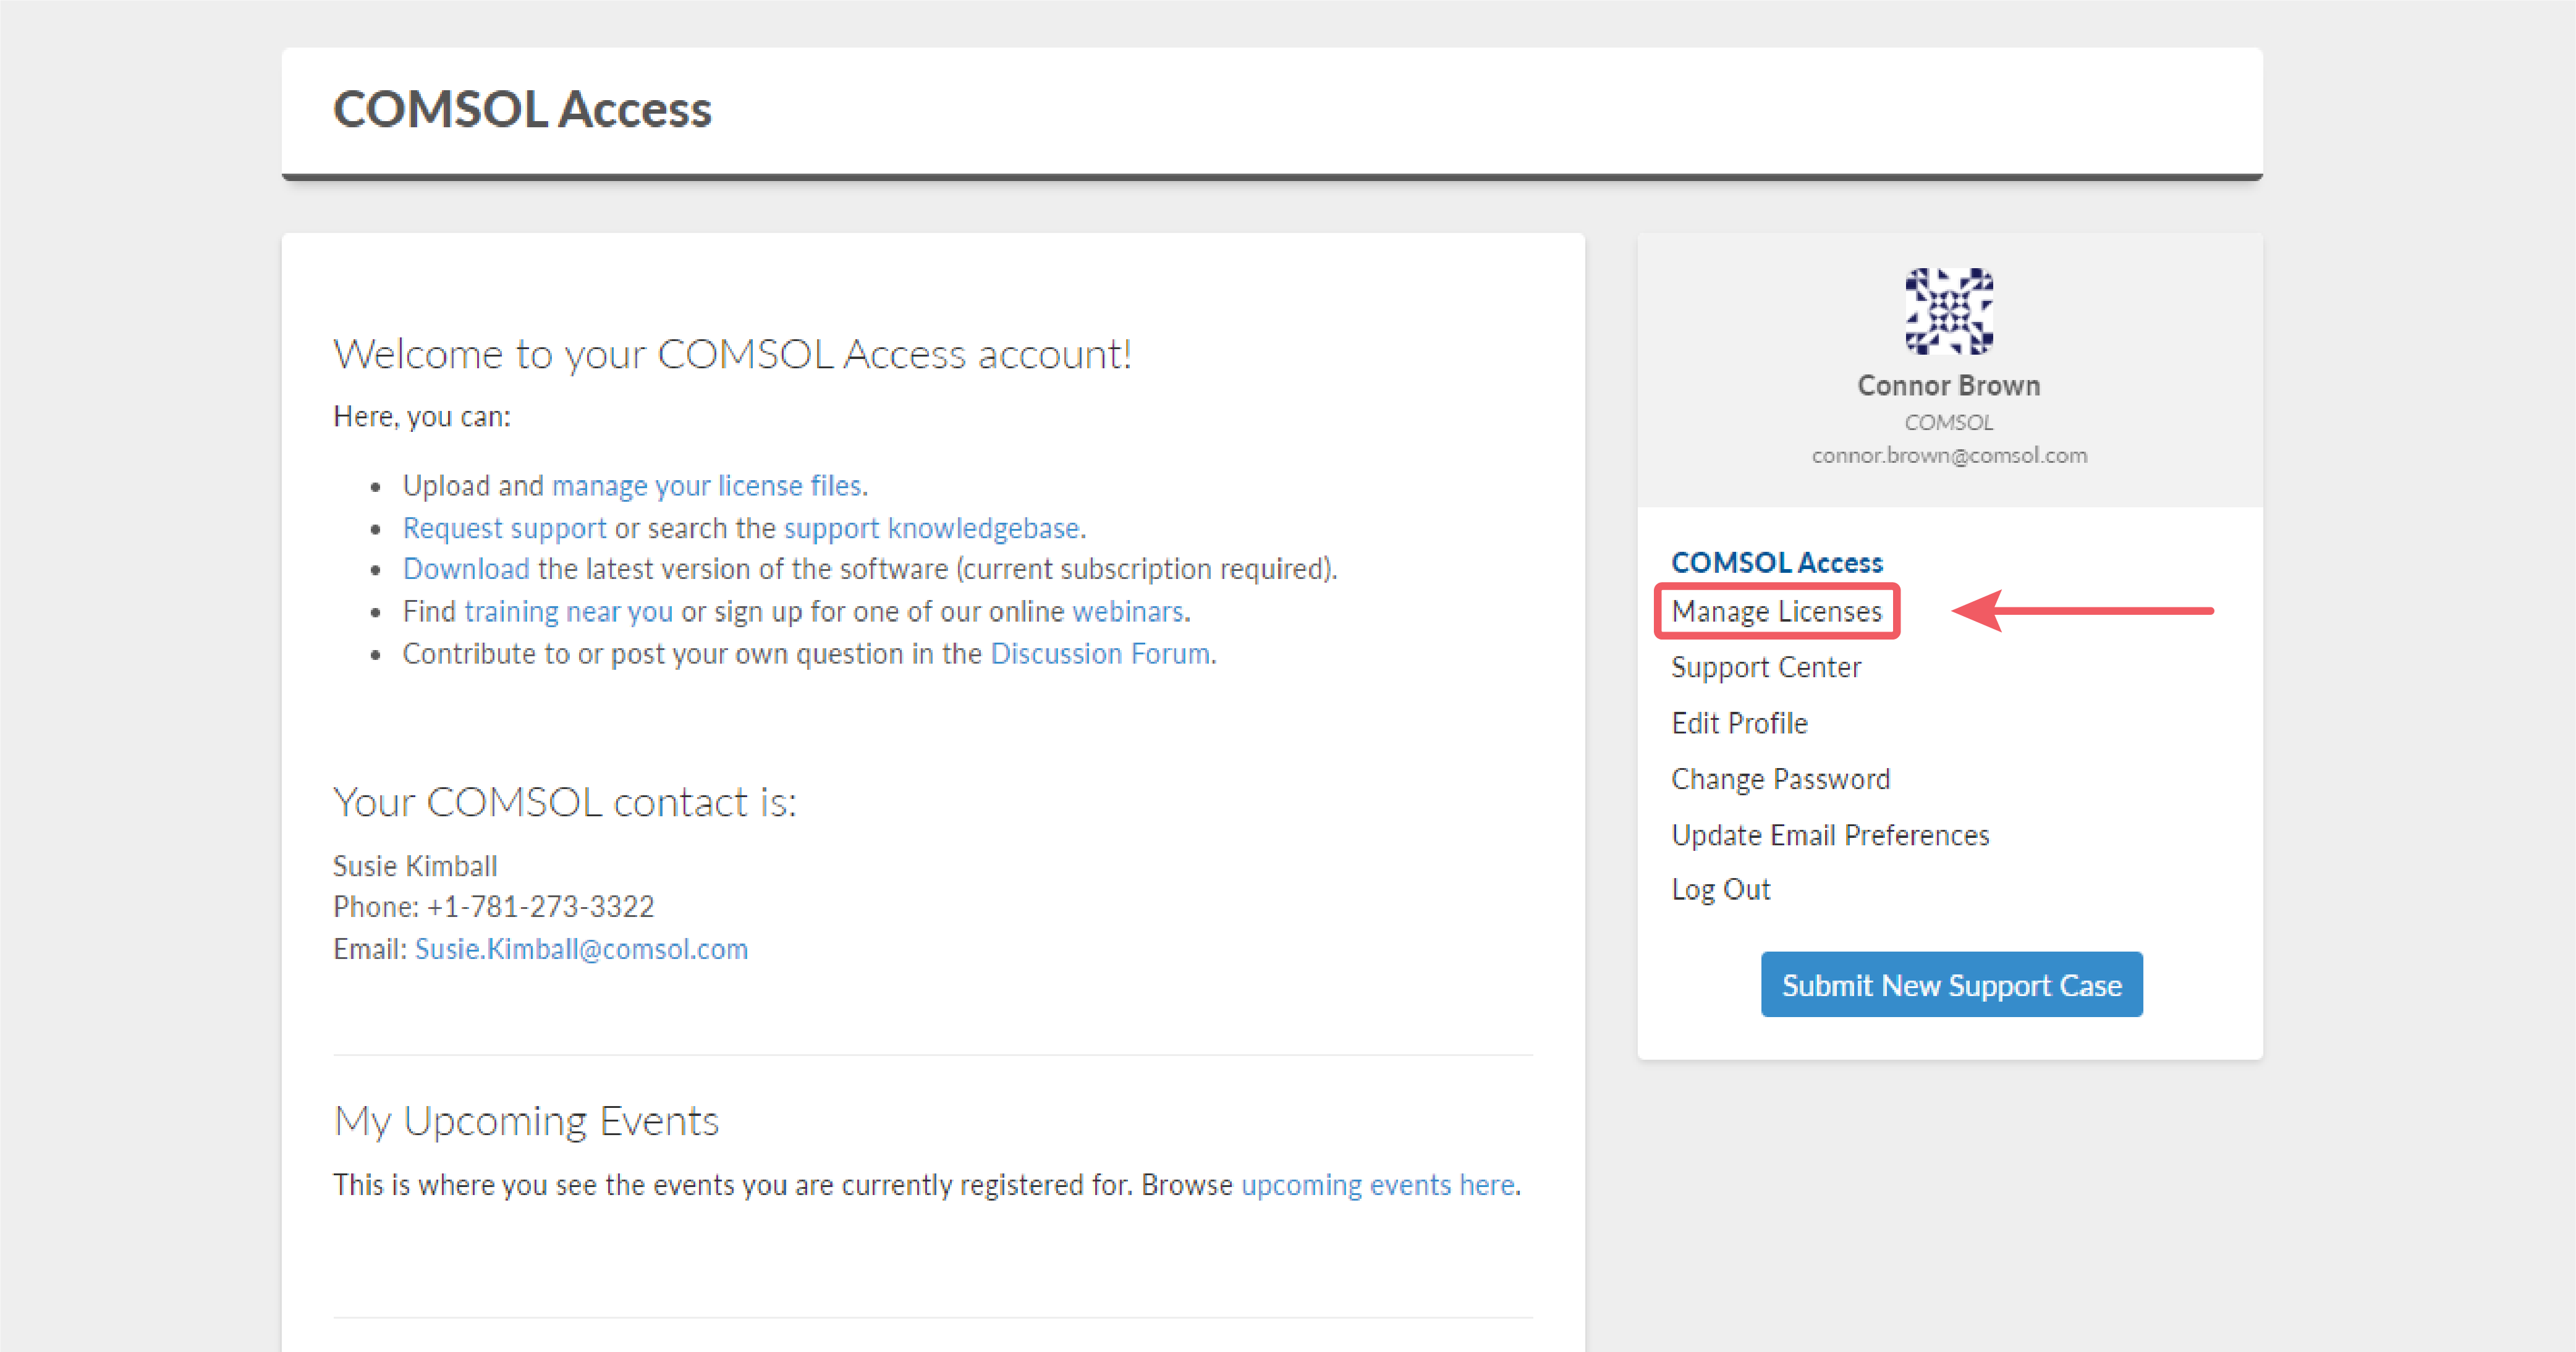 A UI screenshot showing the Manage Licenses link on the main page of a COMSOL Access account.
The COMSOL Access main page, where you will land once you have logged in.
A UI screenshot showing the Manage Licenses link on the main page of a COMSOL Access account.
The COMSOL Access main page, where you will land once you have logged in.
- Click Add License and upload your license file or enter your trial passcode to enable the COMSOL installer to be downloaded.
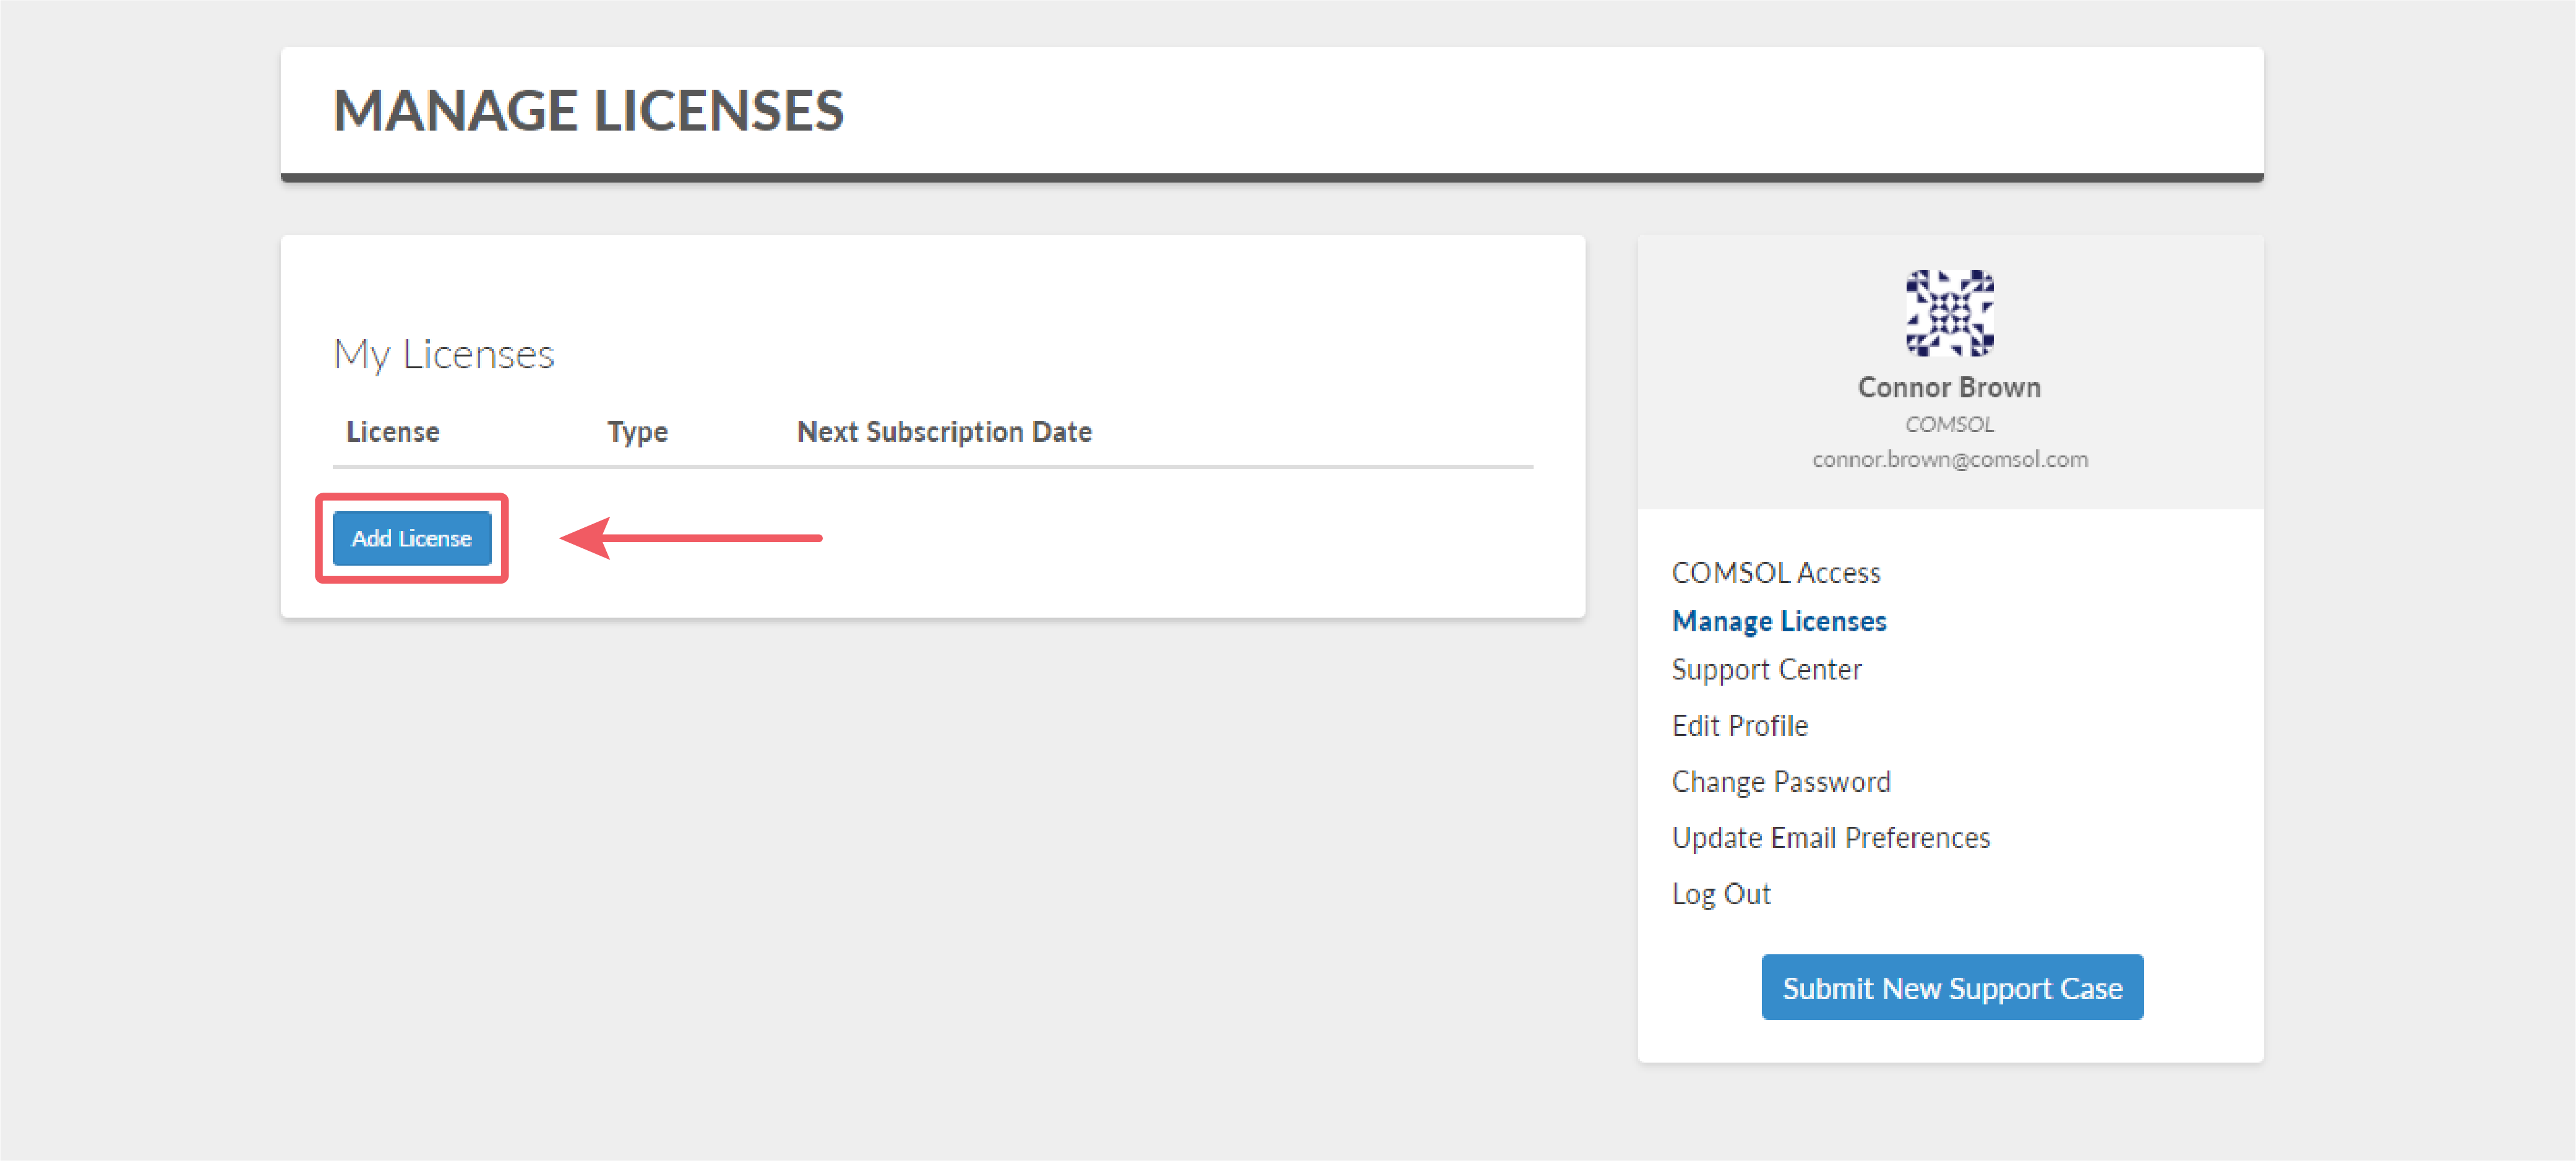 In a UI screenshot of the Manage Licenses page, the Add License button is highlighted in red and pointed out with an arrow.
Add or manage your licenses on the Manage Licenses page.
In a UI screenshot of the Manage Licenses page, the Add License button is highlighted in red and pointed out with an arrow.
Add or manage your licenses on the Manage Licenses page.
Step 3. Download the Installer
Once you have added your license or licenses to COMSOL Access, navigate to Product Download. Click the download button for your operating system: Windows®, Linux®, macOS Intel®, or macOS M1. If you have a Mac with an M1 processor, you can choose to use either the M1 or the Intel®-based version of COMSOL Multiphysics®. For more information about these options, view this Support Knowledge Base entry.
 In a UI screenshot of comsol.com/product-download, the download buttons for Windows, Linux, macOS Intel, and macOS M1 are outlined in red.
The download page showing the download buttons for WindowsWindows®, Linux®, macOS Intel®, and macOS M1.
In a UI screenshot of comsol.com/product-download, the download buttons for Windows, Linux, macOS Intel, and macOS M1 are outlined in red.
The download page showing the download buttons for WindowsWindows®, Linux®, macOS Intel®, and macOS M1.
Step 4. Video: Running the Installer
Once you have downloaded the installer, you can follow along with this video to install COMSOL Multiphysics® with the default settings. The video also includes a brief description of the options for configuring the installation to your preferences. These options are explained in more detail below.
Optional Configuration of the Installation
When running the installer, you can reconfigure settings on the following tabs if the default settings are not optimally suited to your needs. For a more complete breakdown of the entire installation process, refer to the full COMSOL Multiphysics® Installation Guide.
Products Tab
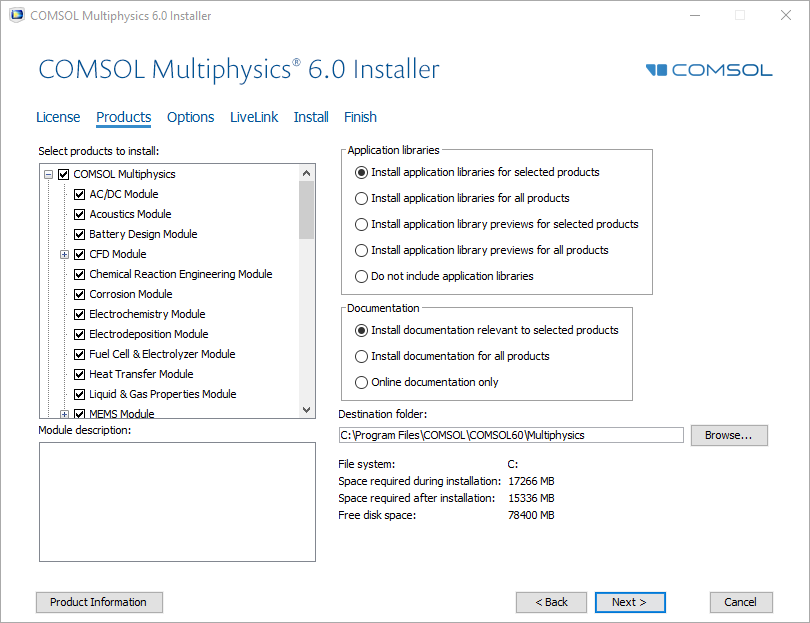
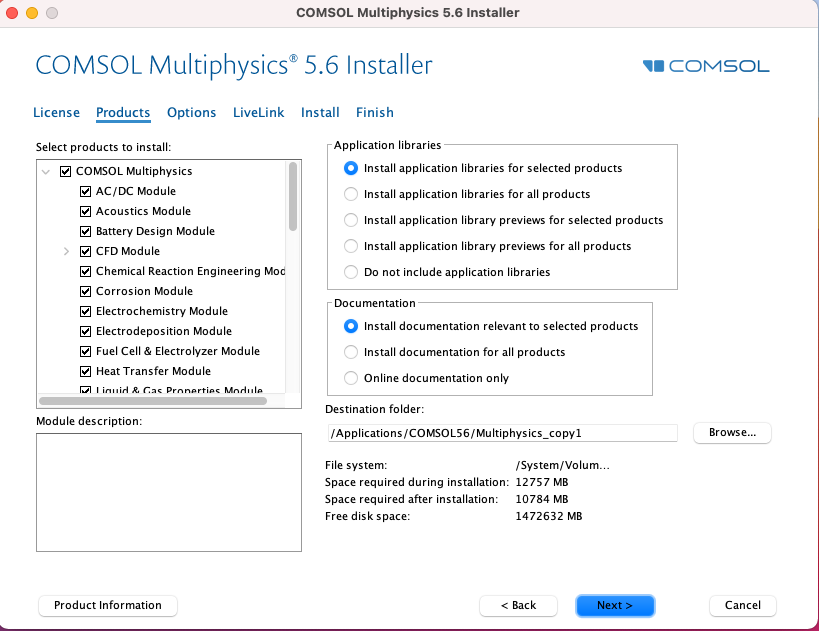
The Products tab displays your options for what you want to install. Under Application libraries, you may choose your preference of which application libraries to install. The application libraries contain tutorial PDF guides with tutorial models for reference. To save space, you have the option to install only the previews of the application libraries; the full entries will still be available to download later. You can also choose whether to install product documentation for all of the COMSOL® products or for only those you have chosen to install. Lastly, you can select the file location for installation or keep the default location.
 A UI screenshot of the COMSOL installer with the Products tab selected.
The default settings in the Products tab. (View the Products tab on macOS.)
A UI screenshot of the COMSOL installer with the Products tab selected.
The default settings in the Products tab. (View the Products tab on macOS.)
Options Tab
You may choose to use a variety of options intended to make the software easier to use. Under the Options section are toggles to enable some convenient additions during installation. The first five settings are enabled by default, starting with two ways to create shortcuts to COMSOL Multiphysics®. Adding firewall rules allows COMSOL Multiphysics® to function without restrictions. Associating .mph files with COMSOL Multiphysics® enables your computer to automatically open COMSOL Multiphysics® when selecting these files. Installing DirectX® runtime binaries helps with multimedia-related tasks.
You also have a few more options you can turn on. You can set a permanent security policy for applications. If you enable a security policy, a Security tab will be added later in the installation process for you to configure your policy. If you have a proxy server, you can enter its information on this tab. Installing the PowerPoint® interface for the current user or all users is helpful if you plan to give presentations based on your simulations. Checking for updates after the installation and automatically each time the software is launched will help make sure that COMSOL Multiphysics® is up to date with the most recent improvements.
 A UI screenshot of the COMSOL installer with the Products tab selected.
The default settings in the Options tab. (View the Options tab on macOS)
A UI screenshot of the COMSOL installer with the Products tab selected.
The default settings in the Options tab. (View the Options tab on macOS)
Security Tab
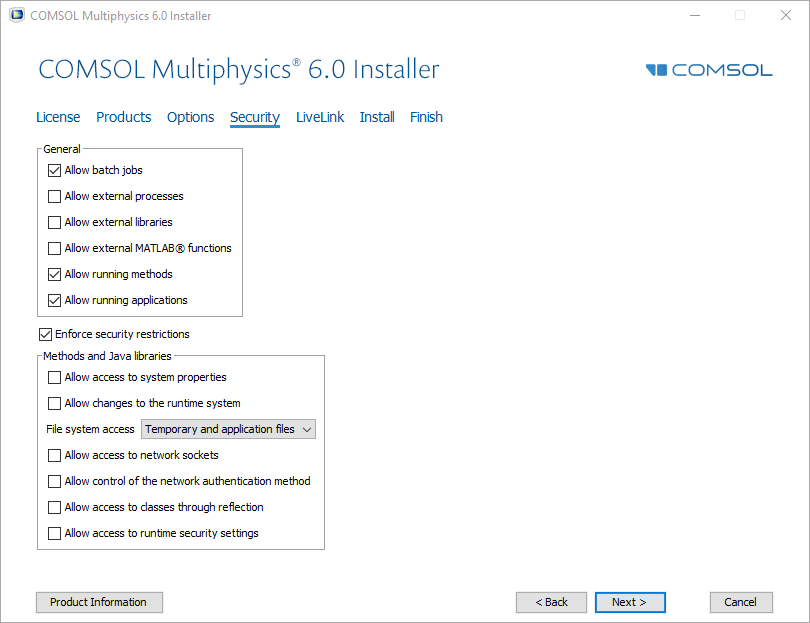
The Security tab will only appear if you have selected the Set permanent security policy for applications check box in the Options tab. The default settings are shown below, but you may choose to enable or disable the settings as needed. We recommend referring to the full COMSOL Multiphysics® Installation Guide for more information on each of these settings.
 A UI screenshot of the COMSOL installer with the Security tab selected.
The default settings in the Security tab.
A UI screenshot of the COMSOL installer with the Security tab selected.
The default settings in the Security tab.
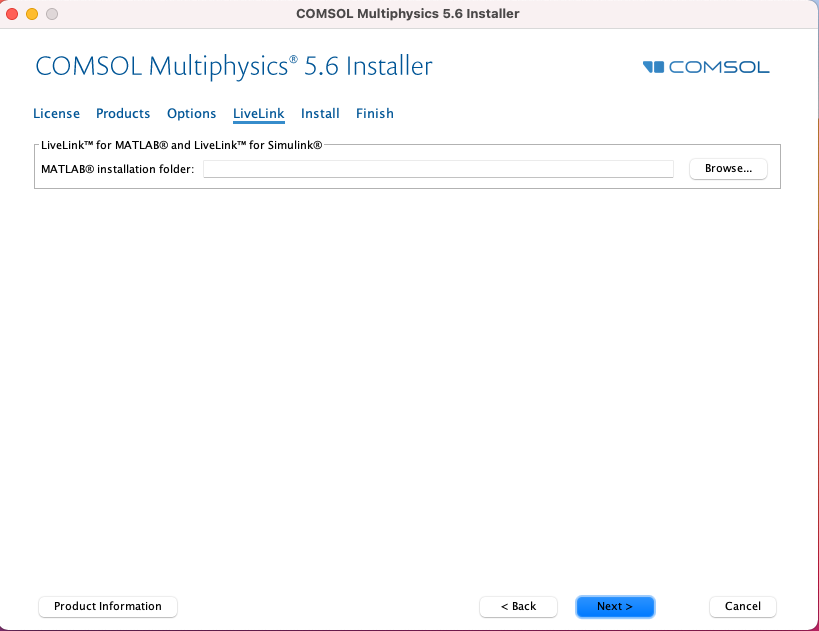
LiveLink Tab
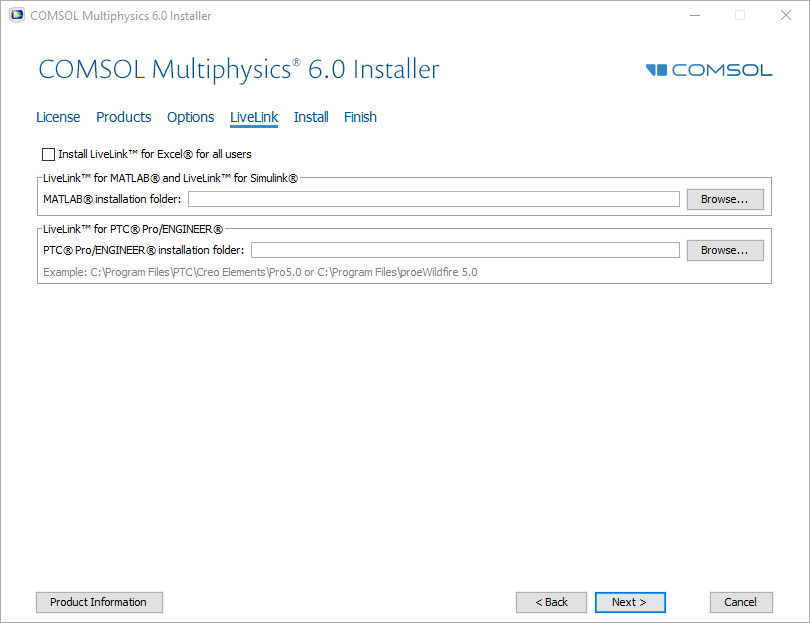
If you have a product to use with COMSOL Multiphysics® via LiveLink™, this tab is where you will configure that connection. By default, the installation of LiveLink™ for Excel® is available to the current user only, but clicking the corresponding check box (see screenshot below) enables installation access for all users. To install LiveLink™ for MATLAB®, LiveLink™ for Simulink®, or LiveLink™ for PTC Pro/ENGINEER®, specify the path to the product's respective installation or common file folder. You can find more information for installing your LiveLink™ product in the full COMSOL Multiphysics® Installation Guide.
 A UI screenshot of the COMSOL installer with the LiveLink tab selected.
The default settings in the LiveLink tab. (View the LiveLink tab on macOS)
A UI screenshot of the COMSOL installer with the LiveLink tab selected.
The default settings in the LiveLink tab. (View the LiveLink tab on macOS)
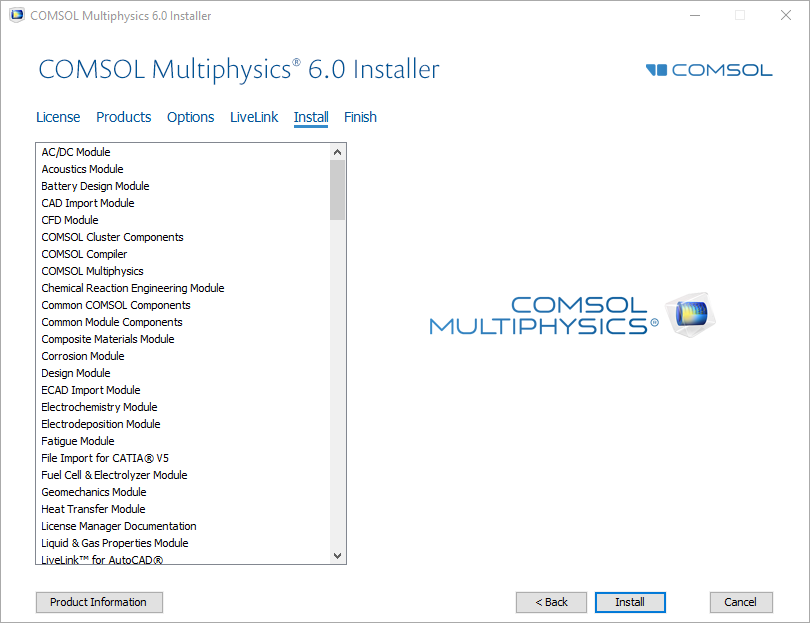
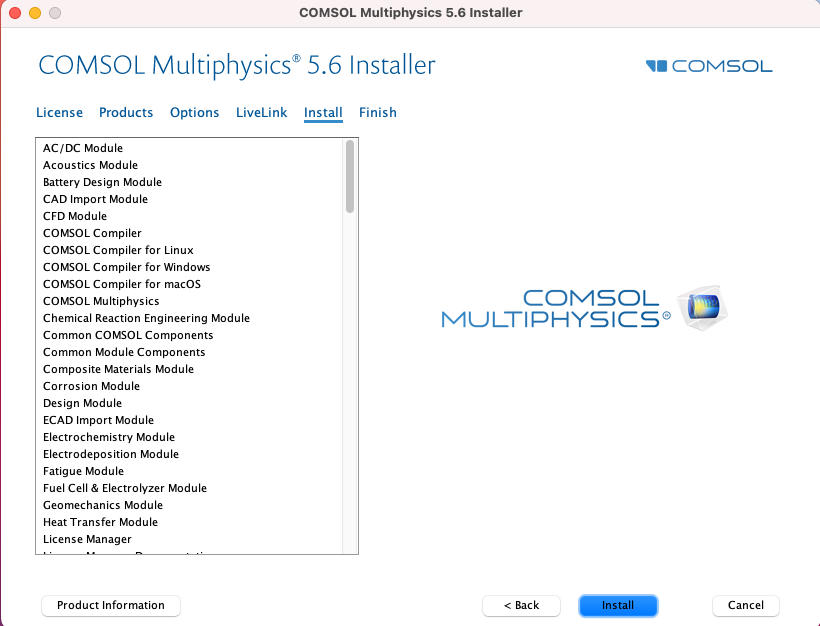
Install Tab
The products that you have selected and the required components for installation will be listed here. If you require any products not listed, you may need to verify that they are selected on the Products tab. You can find more information on our suite of products by clicking Product Information.
 A UI screenshot of the COMSOL installer with the Install tab selected.
The Install tab highlighting the Product Information button, which leads you to more information on our product suite. (View the Install tab on macOS)
A UI screenshot of the COMSOL installer with the Install tab selected.
The Install tab highlighting the Product Information button, which leads you to more information on our product suite. (View the Install tab on macOS)
Additional Support
We recommend the full COMSOL Multiphysics® Installation Guide for more extensive information.
For help with installation, contact your local administrator or COMSOL representative. If you require further assistance, contact COMSOL Support.
Submit feedback about this page or contact support here.